I have used quite a few professional SMD rework stations before, but those professional grade ones tend to be quite pricey. So when I decided to get a hot air rework station for my own personal use, I settled on the cheaply priced X-TRONIC 4040 hot air rework/soldering station combo. In this blog post, I will do a detailed review of this rework station and walk you through some of my observations. In the next time I will do a review of its internal construction.
For those who are impatient, you can find my review conclusions in the summary section towards the end.
Depending on where you got your unit, this rework station can be had for just above 100 US dollars. For this price range, it is clearly targeted at electronics enthusiasts and hobbyists.
In order to achieve this low price point, there are some design compromises the designers had to make. For instance, the unit does not have an air flow meter, so the speed of the air flow cannot be adjusted precisely and can only be gauged by experience. This should not be an issue for general uses however, as most of the SMD soldering work does not need that level of precision in a non-professional setting. Also, the hot air wand does not turn off automatically when it is in the holder which some might consider it a fire risk. Other slightly more expensive brands typically have magnetic sensors built in and would automatically turn off the heating element once the hot air wand is placed back onto the holder, allowing the unit to properly cool off. In my opinion though, the omission of this feature is actually more convenient as having to wait for the hot air wand to achieve its operation temperature every time can be quite annoying.
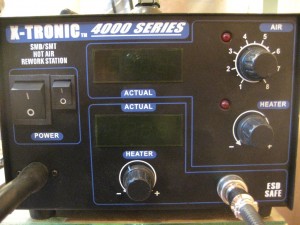
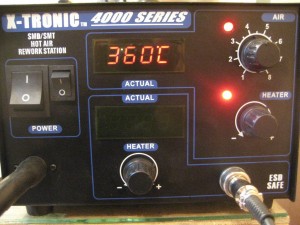
It seems that there are two models (X-TRONIC 4040 and X-TRONIC 4000) on the market that are very similar to one another. I am actually not quite sure whether there is any difference between model X-TRONIC 4040 and X-TRONIC 4000. As far as I can tell, the only difference seems to be that the 4040 model includes a lighted magnifier lamp and the 4000 model does not. But the main units themselves seem to be identical, both have “X-TRONIC 4000 Series” printed on them (see picture below).
My unit came with the lighted magnifier lamp. At first I was a little skeptical as the lamp feels pretty cheap and the base is lighter than adequate which means that it can tip over easily if the lamp is leaning too much in one direction. But after I started using it for a while, I found that the magnifier actually worked surprisingly well, presumably due to its large size. Those tiny markings on the SMDs can be easily identified without too much eye strain. It is especially pleasant to use when compared to my small eye loupe I used before. The included fluorescent ring lamp is not particularly bright however and is not useful as a bench light, but it is bright enough for what it does. Finding the replacement bulb could be difficult however, I have not seen any ring shaped fluorescent bulbs of the exact size. But I am not too worried, as the ring lamp can be easily adapted to using LEDs lighting should it break.
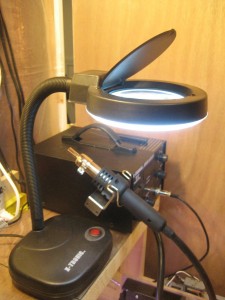
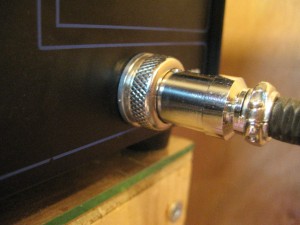
The tubing for the hot air wand comes already attached to the main unit. There are three screws at the bottom of the unit which are used to secure the pneumatic pump during shipping and must be removed prior to turning on for the first time. The only parts that need to be attached are the soldering iron and the holder for the hot air wand. The soldering iron has a keyed 5-pin female plug that plugs firmly into socket on the main unit. The ring outside the plug is threaded and secures tightly onto the socket.
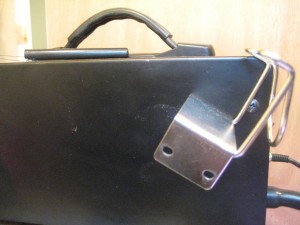
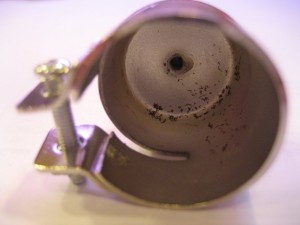
The metal holder for the hot air wand can be mounted on either side of the unit which is clearly a nice design consideration. But as you can see in the picture below, one of the screws is in the way of the holder when the holder is mounted regardless of which side the holder is on. The protrusion of the screw makes the holder surface not resting flush against the side. But it really is just a minor annoyance than any real problem. The main unit itself has three mounting holes on each side of the case but only two are needed for the holder included. It is quite possible that the case was designed for multiple brands and different types of holders can be mounted.
The unit comes with four hot air nozzles with the following nozzle sizes: 9.5mm, 6.5mm, 4.5mm and 2.5mm. These sizes should cover a good range of rework tasks. The quality of these nozzles is not all that great though, a couple of the nozzles I received showed sign of rusting inside. But for the price I paid, I really cannot complain too much here. These cosmetic defects are not likely to affect the soldering job nor would they affect the durability of the nozzle anyway.
 |
 |
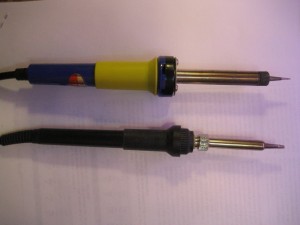
The soldering iron that comes with the X-TRONIC 4040 (or X-TRONIC 4000) is smaller and lighter than a typical 30W soldering iron (see comparison in the picture below), but it grips nicely and holds comfortably in hand. The connection cable is soft and flexible making it less obtrusive when soldering. There are ten assorted soldering tips included in the package: 4 conical tips (Hakko shape code I, 0.25mm to 1mm); 4 slanted-cut tips (Hakko shape code BC/C, 1mm to 4mm), 1 screw driver tip (Hakko shape code D, 2mm x 1mm) and 1 knife tip (Hakko shape code K, 7mm x 0.5mm). I am actually not sure whether the Hakko ones would fit properly and the model numbers are included just for reference purposes.
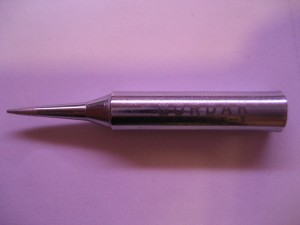
All the tips are coated and presumably offer a longer service life. But from the picture below you can see that the coating is only applied to the very tip of the ironing tip and overall the tip’s quality does not look as good as other soldering tips that I have used before. While I did not encounter any issues during the past couple of days’ intense use and there is no signs of any premature wear and tear, these tips’ long term performance remains to be seen. But again, there is something to be said about quantity versus quality. Given the number of tips included, you can basically try out a few different ones and settle on the tip you like the best. Should that one wear out you can always buy a higher quality replacement tip of the exact kind.
If you look carefully, you can see the marking on the tips reads “Gordak”. I assume that these tips are sourced from Gordak Electric Factory. And if you followed the link, you will see that Gordak is specialized in manufacturing SMD rework soldering stations. Browsing through a few of its products, I found that the X-TRONIC 4040 looks strikingly similar to Gordak’s 952B except perhaps that 4040 has a digital temperature readout for the soldering iron but the 952B has only a temperature labeled dial and a LED indicator for the iron to reduce cost. But if you look at the side panel, there are three mounting holes for the holder, which is exactly the same as the X-TRONIC 4040 I have.
I would not be surprised if X-TRONIC 4040/4000 are actually manufactured by Gordak after all, and they are simply just re-branded as X-TRONIC. This practice is very common in these low-end electronic products. In fact the X-TRONIC 4040 rework station was shipped in generic white boxes with no manual or any manufacturer information – another tell sign of these re-branded cheap Chinese products.
 |
 |
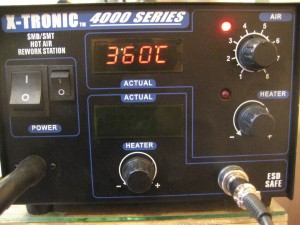
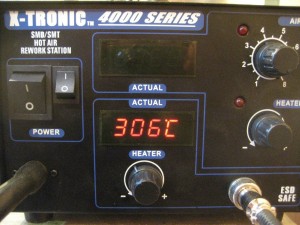
The hot air wand and the soldering iron can be operated independently (see pictures below). The larger switch and the two knobs to the right control the hot air wand while the smaller switch and the knob towards the bottom middle control the soldering iron. It is clear that the designer had put more emphasis on the hot air portion than the soldering portion as there are two additional LED indicators for the hot air wand control but only a 7-segment display for the soldering iron.
The upper LED indicator seems to be on whenever the hot air wand is turned on and the bottom LED indicates whether the hot air heater is on or not. When the hot air wand reaches the preset temperature, the heater would switch between on and off every few seconds to maintain a steady temperature and you can see this from the flashing of the bottom LED indicator.
It is quite intriguing to me as to why the upper LED was included in the design, as it serves no apparent purpose other then telling you that the hot air unit is on. But you can already tell this via the 7-segment temperature display. So maybe the basic design of this hot air rework station is shared with ones that do not offer the 7-segment display, in which case the LED would be used to indicate whether the hot air unit is on.
 |
 |
 |
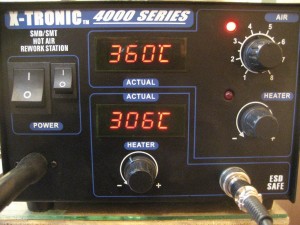 |
From the pictures above, you can see that the temperature display is in Celsius. Unfortunately, there is no way to change this display setting to Fahrenheit. While I personally do not really care what the temperature unit is in as I could convert them back and forth easily, it is a little disappointing to see that a product sold in North America does not offer Fahrenheit reading as an option.
The hot air wand takes some time to reach the preset temperature. From power up, it takes roughly 45 seconds to reach 350 C (662 F) and it takes an additional 15 seconds if you want to go up to 375 C (707 F). According to the data sheet, the hot air temperature can be adjusted between 150 to 500 Celsius (302 to 932 Fahrenheit) and the air flow can be adjusted from 0.3 to 24 liters per minute. These specifications are quite typical among these entry level rework stations.
The heater for the hot air is specified at 250W, which seems to be a bit under powered (most rework stations in this price range have heaters power rated north of 500W). To be sure, I measured the power consumption of the unit with just the hot air on and the reading came at around 266 W which means that the heater specification is more or less accurate. So maybe by including a beefier heating element the heat up time will be shorter.
But the hot air feels adequate once it reaches operating temperature and I had no trouble de-soldering large components such as a 256 pin TQFP chip and a large BGA chip. While I could not measure the actual air flow volume, it seems that the hot air comes out quite strong when the air flow dial is set to the maximum.
The soldering iron is rated at 60W, but it measures only at about 45W when in use. So the number in the specification is clearly overstated. But even at 45W there is sufficient power for most soldering job. Unlike the hot air wand, the soldering iron heats up very quickly and within 20 seconds after powering on it is ready for use.
When the unit is turned off, it does not power off immediately if the hot air wand was used. Instead, the pneumatic pump will continue to operate until the nozzle temperature drops below 50 degree Celsius (122 F) as a safety measure. One thing to note is that the air flow speed during this cool off period is set according to the dial setting, which means if you accidentally turned down the airflow after shutting down the unit the nozzle temperature would go down very slowly due to the weak air flow. In my opinion during this cool off period the airflow should be automatically increased to the maximum so that the heating element can cool down quickly.
As I mentioned before, there is no auto power-off feature for the hot air wand, this means that the hot air will continue to blow at the set temperature and speed even when the wand is placed back in the holder. This could potentially be a safety issue given the high temperature at the nozzle outlet. But as long as your rework station has enough clearance from everything else, it really poses very little risk as the temperature drops quickly when you move away from the nozzle.
This unit also has no central shut-off switch (i.e. hard-wired on/off switch) since it has to provide power to the pneumatic air pump after the hot air unit is switched off. The standby power consumption is at a reasonable 3W.
One thing I noticed is that when you plugin the unit into an outlet, the 7 segment displays would come on briefly before going into standby mode. Since there is no way to really turn off the unit I am a little skeptical as to whether the unit could somehow be accidentally powered on by itself while the switches are off (which would be a safty risk) so I would strongly recommend only connecting it to an power strip which could be turned off independently and double check to ensure that the power is off when you are done with your work. Thankfully this is not an issue for me as I have a central power switch in my lab.
Despite a few aforementioned shortcomings, X-TRONIC 4040/4000 really gives you plenty of bang for the buck. And it does the job pleasantly well.
Summary
Pros:
- Relatively quiet operation
- Hot air wand holder can be placed on either side of the unit
- Soldering iron heats up quickly
- Flexible tubing and wiring
- Replacement heating elements for both the hot air wand and soldering iron included
- Includes a magnifier lamp, which is very useful
- 10 assorted tips included (with one installed)
- Iron and hot air wand can be operated independent of each other
- Good overall performance
Cons:
- Some cosmetic defects
- No air flow meter
- Slightly weak heating element for the hot air
- No central off switch for the unit (system remains connected to the mains when off)
- No auto off capability when hot air wand is placed in holder
- Some parts not of top quality
- Temperature displays only in Celsius.

