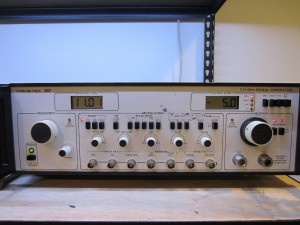
As I mentioned in my previous posting, there was an issue with my Wavetek 907 microwave frequency generator. While everything was fine during my initial testing, the frequency display is now stuck with an out-of-range display and the adjustable frequency range is limited to between around 6.9 Ghz to 7.9 Ghz (instead of all the way up to 11 Ghz). My initial suspicion was that the PTC heater inside the YIG–Gunn oscillator was malfunctioning. But as it turned out, it was something else.
Since initially my gut feeling told me that the YIG oscillator might be at fault, I thought I would at least try taking it apart to see if it was something trivial to fix. And even if it is beyond economical repair, it would at least be a pretty interesting teardown of the YIG oscillator itself.
Dissembling the YIG oscillator was a bit more involved. I first had to take off the mounting screws and unfasten the directional coupler (see teardown images in my previous post) in order to get it out of the RF assembly. Then I had to remove the mounting screws holding the two halves of the cylinder together. The SMA connector also needed to be removed as it was used to hold the top and bottom covers together.
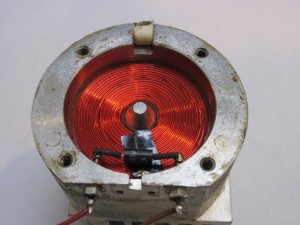
The picture below shows the main coil of the YIG oscillator:
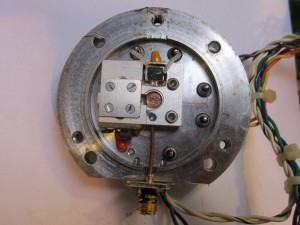
Here are two pictures of the YIG oscillator itself. The two insulated wires at the top are the wires to the PTC heating element. As it turned out, the measured 240 Ohm nominal resistance was correct after all. Since the area heat needs to be maintained is extremely small, this low-power heater is actually sufficient to keep the YIG sphere heated at around 100 degree Celsius.
The two magnetic wires coming in from the right are connected to the FM coil. And the Gunn bias voltage is supplied from the bottom (ground referenced). The picture to the right shows a close-up of the Gunn bias supply circuitry.
|
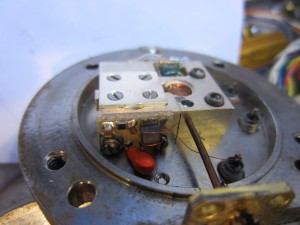
|
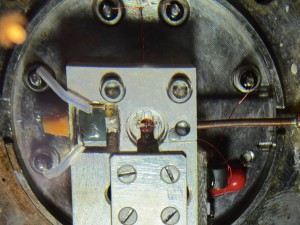
The center of the YIG oscillator is protected and shielded by a small piece of copper on the top. After carefully removing the thin copper cap, we can see the core of the YIG oscillator. From the picture below, you can clearly see the orthogonal coupling wires around the YIG sphere (click to see the picture in higher resolution). The actual size of the Yttrium iron garnet is tiny. If you look carefully, you can see a small shinny spot in the center of the coupling wires and that is the YIG sphere. The diameter of the YIG sphere is around 1 mm. The small coil surrounds the YIG sphere is the FM coil.
One important thing to note is that these high frequency equipment are extremely sensitive and dissembling and assembling will likely to change its factory calibrations. If you take a look at my previous teardown photos, you will notice that there was a layer of black paint over the RF connectors. This paint is silver based conductive paint, it is used to minimize the electromagnetic field leakage. Ideally, each connection should be tightened using the specified torque wrench and the surface between the connectors should be repainted after the assembly.
After ruled out the possible issue with the YIG heater, I went over the trouble-shooting procedures listed in the manual and quickly realized that the Gunn biasing circuitry was at fault. According to the service manual, the Gunn bias voltage should be around 14V at 7Ghz and 7V at 11Ghz. What I measured was a constant 16V regardless of where the frequency adjustment knob is positioned at. Measurement of test point 25 further affirmed this finding. In normal operation, the voltage at TP25 should range between -0.7V to -1.1V, but the measured voltage was stuck at -4.6V.
Further testing revealed that the OpAmp (U18, CA1458) that’s driving the frequency display might be faulty as the voltages between the two inputs are at around 4V instead of 0V (the voltage difference between the inverting and non-inverting inputs of an OpAmp should be close to zero in linear mode). I don’t have any CA1458’s on hand, but an LM258 should be close enough. In case I need to swap out the chip again in the future, I soldered on an IC socket. Below are a picture of the original CA1458 and a replaced socketed LM258:
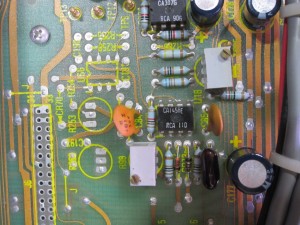
|
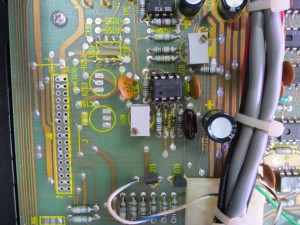
|
As you can see in the picture below, the microwave generator is now fixed and the its output frequency can be adjusted all the way up to 11 GHz.
Below is a short video showing the calibration of the Wavetek 907 frequency display against the HP 5350B microwave counter after the Gunn biasing circuitry had been fixed.
|
View on YouTube in a new window |
