As mentioned in my previous post, besides the broken LCD there was also an issue with the power supply portion of the unit and the output voltage was clamped at around 10 to 11V. The digital circuitry portion however seemed to be intact. Unfortunately since an identical LCD is virtually unobtanium, I thought I’d reverse engineer the LCD protocol so once the power supply is fixed I can fix the display by hooking up a different LCD.
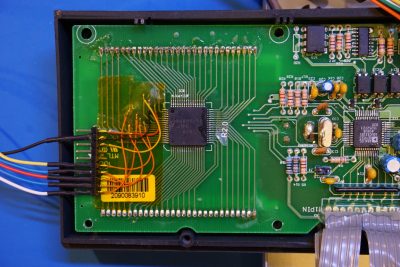
The LCD driver used in the BK Precision 1696 is an NJU6433F, and it uses a 4-wire serial communication protocol that is similar but not totally compatible to SPI. To capture the data sent to the LCD during operation, I connected pin 54 (Vss, GND), 56 (CE), 57 (SCL), 58 (DATA), 59 (MODE) and pin 60 (INH) of the chip (from top to bottom in the picture below) to a header so I can hook them up a logic analyzer.
Once the logic analyzer is hooked up, I powered up the BK Precision 1696 using an isolation transformer and also connected the serial port to the computer so I could use BK Precision’s SDP software to control the power supply and obtaining the display data. This is extremely helpful as I would not otherwise be able to see what’s being displayed on the LCD at any given moment given the fact that the display was broken.
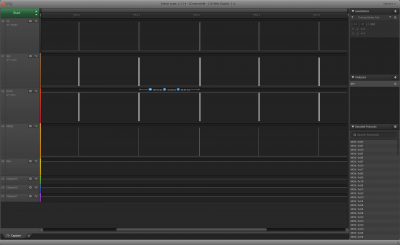
By setting the protocol to SPI and mapping SPI clock to the LCD driver’s SCL pin, MOSI to the DATA pin and SPI enable to the CE pin (it uses logic high as enable), I was able to capture the data packets sent to the display driver. As you can see from the capture below, the data frame rate is at roughly 10 frames per second.
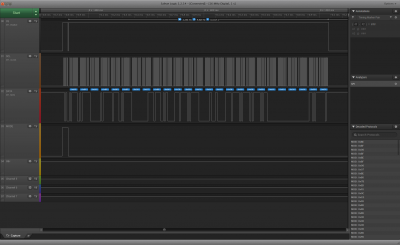
And here is a zoomed in capture showing an entire data frame. Note that the CE signal is not what you typically expect from a SPI protocol as there are technically two frames. The first frame, which coincides with the MODE assertion, is to set the transfer mode of the NJU6433F LCD driver. This frame contains 4 bits and is the same across all the data frames. The logic analyzer software seems to be able to happily ignore this half byte and decode the actual display data without a problem.
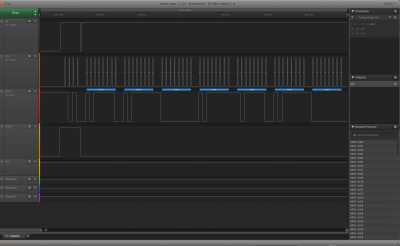
Once again, the picture below shows the captured data zoomed in even more. Each frame contains 25 bytes of data which are decoded into the decoded protocol pane.
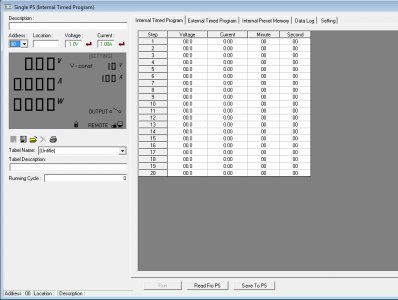
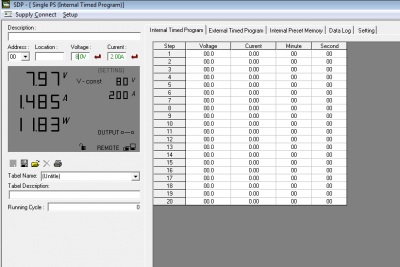
One of the more challenging aspect of protocol reverse engineering is to make sense of the data, and for that we will need a clear strategy. To make the reverse engineering a bit easier, I first disabled the output and using the SDP software to increment the output voltage 100mV per step and at the same time recorded the waveforms as Vset changed from 1.0V to 1.9V. While adjusting the set voltage, the set current is fixed at 1A so the only changes in the output should correspond to the set voltage and nothing else. And then I incremented the set voltage 1V at a time from 2 to 10V and recorded the waveforms again. Finally I captured the waveform when the set voltage is at the maximum (20V). Once I have identified the bytes that control the set voltage, I used similar technique and identified the bytes that is responsible for setting the current.
|
|
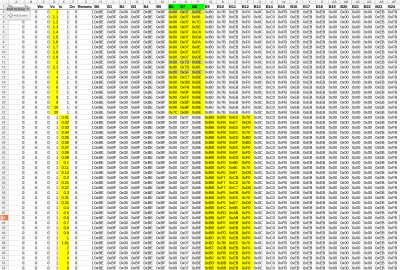
Once the bytes for controlling set voltage and set current display are identified, I went on and analyzed the bytes that are responsible for the actual output voltage and output current. Here is a screenshot showing a portion of the captured data. For those who are interested, the entire spreadsheet of the captured data can be downloaded here.
The next step is to analyze the data to see if there is any pattern to it. For instance, here are the sequence of set voltage captured and the change in data is observed in three bytes (B6 B7 B8).
Vs	B6	B7	B8
1.0	0x00	0x07	0xBE
1.1	0x00	0x07	0x06
1.2	0x00	0x07	0x7C
1.3	0x00	0x07	0x5E
1.4	0x00	0x07	0xC6
1.5	0x00	0x07	0xDA
1.6	0x00	0x07	0xFA
1.7	0x00	0x07	0x0E
1.8	0x00	0x07	0xFE
1.9	0x00	0x07	0xDE
2.0	0x00	0x7D	0xBE
2.1	0x00	0x7D	0x06
3.0	0x00	0x5F	0xBE
4.0	0x00	0xC7	0xBE
5.0	0x00	0xDB	0xBE
6.0	0x00	0xFB	0xBE
7.0	0x00	0x0F	0xBE
8.0	0x00	0xFF	0xBE
9.0	0x00	0xDF	0xBE
10.0	0x06	0xBF	0xBE
20.0	0x7C	0xBF	0xBE
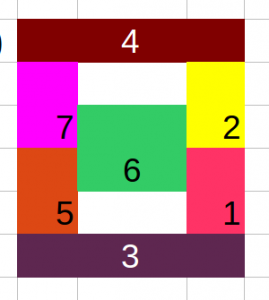
With a little bit knowledge of how a 7 segment display works and by examining data pairs with only a single segment difference (for instance 1.0 and 1.8, 1.1 and 1.7 etc.) we can easily map out which bit corresponds to which segment (see below). Because there are eight bits, one of the bits in each byte is used for other purposes. The last bit in this group (B6 through B8) for instance is used for the decimal point.
So the voltage setting 1.9V for instance corresponds to (0x00 0x07 0xDE), which translate intos 00000000 00000111 11011110 in binary and using the decoded 7 segment mapping above, we can see that this number series corresponds to the display value “1.9”.
Here is a list of digit 0-9 and their binary and HEX representations:
DEC	BIN		HEX
0	10111110	0xBE
1	00000110	0x06
2	01111100	0x7C
3	01011110	0x5E
4	11000110	0xC6
5	11011010	0xDA
6	11111010	0xFA
7	00001110	0x07
8	11111110	0xFE
9	11011110	0xDE
Now we have identified the three bytes for setting the output set voltage readings, let’s take a look at what controls the output current setting. Again, using the same technique by fixing the output set voltage at 1V and adjust the set current from 0.01 to 0.09, 0.1 to 0.9 and finally from 1 to 9.99. From the captured data, we can see that B9 B10 B11 B12 are responsible for the current setting display.
When current is set to 0.32A for instance, B9 through B12 are 0xBB 0xF5 0xE7 and 0xD0 which translates into
10111011 11110101 11100111 11010000
This time the mapping is slightly different than what we saw with the set voltage mapping. By examining across all the captured data for current settings, we can see that the digit segment mappings remain the same but the start and stop location for the digit does not align with the byte boundary as we saw earlier for the voltage setting data.
By rearranging the data, we can see that the first nibble of B9 and the first nibble of B10 (1011 1111) represents “0.”, with the second nibble of B9 used for something else. Then the digit “3” (01001110) is formed by the second nibble of B10 and the first nibble of B11, and the digit “2” (0111110) is formed by the second nibble of B11 and the first three bits of B12. The remain 5 bits again is used for other purposes. This gives us the current setting of 0.32A.
1011 1011 1111 01011110 0111110 10000
Now we have decoded the data for driving Vset and Iset values. For the measured output voltage and current, it is a bit more tricky as the actual measured voltage and current tend to drift a bit. Again, I first captured the output voltage readings with no load. B3, B4, B5 are the bytes that determines what’s displayed for the measured voltages. B13 and B18 also changed, but they are not part of the display data for the output voltage.
Vo	B3	B4	B5
8.96	0xFF	0xDE	0xFB
The measured voltage readings map to our decoded numbers exactly, 0xFF corresponds to “8.”, 0xDE corresponds to “9”, and FA corresponds to “6”, the last bit is set (FB) since we do not have a decimal after 6, that bit is probably used for something else.
The last part we wanted to decode is for the measured current.
Vo	Io	Wo 	B0	B1	B2	B3	B4	B5	B14	B15	B16	B17	B18	B23
4.99	0.82	4.091	0x7C	0xBF	0x00	0xC7	0xDE	0xDF	0x20	0x70	0xED	0xEB	0x7C	0xEF
B3 B4 and B5 correspond to “4.”,”9″ and “9.” and again the last bit of B5 is clearly used for something else. So these three bytes are for the output voltage. The current reading is scattered a little bit. It took me quite some time to figure out how it is assembled in the bytes sent to the LCD driver. After analyzing all the relevant data captures, I figured out that the hundredth and thousandth digits are stored in B0 and B1 respectively. So for the current reading of 0.820A, B0 is 0x7C, which translates into “2” and B1 is 0xBF which translates into “0.”, again the last bit is not used for display purpose. The tenth digit “8” is stored in B23, you will need to swap the two nibbles to get the actual digit. In this case B23 is 0xEF and 0xFE is the representation for number 8. So the current reading “0.820” is captured in B0, B1 and B23.
Other information such as constant current indicator or OVP settings can also be derived using the techniques described above.
In the video below, I did an attempted repair moved on to decoding the protocol afterwards. I will provide more information as I make more progress on the repair.
