Neal at Schmartboard sent me a 0.65mm pitch Arduino prototyping shield kit a few weeks ago. I had meant to do a review right away, but then thought it would probably be even better if I built a real project with this board to see how well it worked first before sharing my experience with you.
Schmartboard is not just another prototyping board. If you read my previous review you’d know that these boards feature specially grooved traces that make hand-soldering SMD ICs magnitudes easier, especially when dealing with chips with a pitch smaller than that of a standard SOIC. The package I received contained a single prototyping shield, some basic components and all the necessary headers. Besides the full kit, Schmartboard also offers just the shield board by itself on its website.
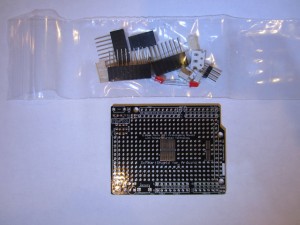
If you take a look at the pictures below, you will notice that this board is extremely well made and with the layout carefully thought out. The board provides pads for a single 28 or fewer pinned SOP/TSSOP device as well as the space for a single SOT23-6 device. Power and ground are laid out in an alternate pattern on either side of the board (one side is for +5V and the other side is for +3.3V) which makes them easy to access. While you can’t use this board to build a complex solution (i.e. Arduino ethernet sheild) or a shield that calls for multiple ICs, the prototyping space provided on this board is more than enough if your goal is to explore the functionality of a single chip.
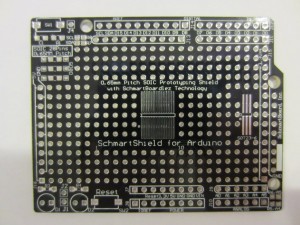
While most of the key components/header locations have silk screen on the board, the traces connecting the vias do not have any overlays. This isn’t a huge problem as you can see where the traces are connected to under proper lighting conditions(nevertheless the dark solder mask makes the traces harder to see), or you could use your multimeter’s connectivity function to find which vias are connected. But it would be ideal if the traces are clearly silk-screened so that all the connected vias can be identified easily. This would be especially helpful for beginners as the Schmartboard website does not provide the actual board layout file(e.g. the .brd file. You can find the schematics and pictures of the actual component layout but not the board layout).
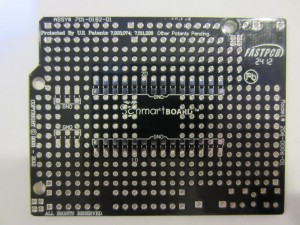
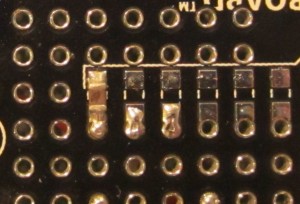
The picture below shows the reverse side of the board. As you can see, there is an 0805 component footprint between each pin and the ground. This well thought feature allows you to add a bypass capacitor or a pull down resistor to any IC pin easily. It would be even more ideal if the board could provide similar pads connected to Vcc as well since many designs call for pull-up resistors. But given the size constraint of the board you would loose some valuable board space for general prototyping needs. So clearly, this was a compromise the board designer had to face.
 |
 |
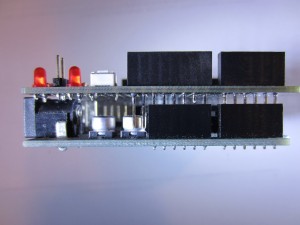
One thing I quickly found out was that the board was designed for the newer Arduino Uno (Rev. 3), which means that if you are using it with an earlier Arduino board, you will end up with a few unused header pins(SCL, SDA and IOREF) dangling. Here are a couple of pictures showing how it looks when the shield is mounted on my Arduino Duemilanove.
 |
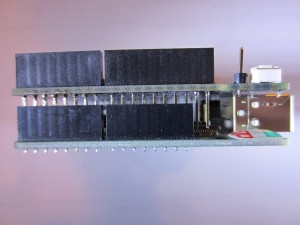 |
Fortunately, you can safely leave these pins alone as they do not interfere with any board components on the Arduino board below. And because of these extra headers, you can even use this board as an adapter between your older Arduino and some newer shields that rely on the new layout.
To test how well this board is suited for prototyping, I decided to build an eight channel I2C shield with a TI PCA9548A 8 channel I2C switch. This chip allows voltage-level translation between 2.5V/3.3V and 5V buses and can communicate with up to eight I2C devices. These features make it very useful to interfacing I2C devices that may require different logic levels. Since this post is a review on the board itself, I will save the programming details on PCA9458A for a later post.
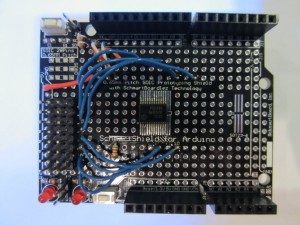
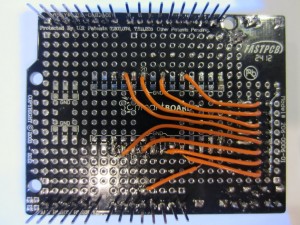
As expected, I soldered the PCA9548A onto the board effortlessly thanks to the grooved traces. Breaking out all the eight I2C channels also proved to be quite easy with this board given the layout. Here are a couple of pictures showing how the eight I2C channels are connected to the 3×8 header:
 |
 |
At $15 (or $10 for just the board), the Schmartboard Arduino prototyping shield kit is not cheap by any means. But given the impeccable build quality and the many well-thought-out features, it is definitely money well spent. And if you have not done much SMD work before, this is a great place for you to start as you probably won’t find an easier SMD prototyping solution than what Schmartboard provides.

