Continue with my previous article, let me first explain the code a little bit.
In the constants definition section, the cut-over frequencies for each LTC6905’s divider setting are defined. These constants are highly dependent on the digital potential meters used. In this case, I used the equation provided in LTC6905’s datasheet:
\[f_{osc}=\left(\frac{168.5MHz*10k\Omega}{R_{SET}}\right)*\frac{1}{N}\]
const float MIN_FREQ = 17.225;
const float MAX_FREQ = 170;

const float FREQ_MIN_X4 = 17.23;
const float FREQ_MAX_X4 = 42.46;
const float FREQ_MIN_X2 = 42.48;
const float FREQ_MAX_X2 = 84.92;
const float FREQ_MIN_X1 = 84.96;
const float FREQ_MAX_X1 = 169.84;

const unsigned int WIPER_MAX = 827;
const unsigned int WIPER_MIN = 410;
As you can see, the frequencies generated using different divider settings overlap. The above frequency intervals and the digital potential meter’s wiper settings are chosen such that the frequency ranges can be switched over smoothly and continuously (without overlapping). The frequency intervals are controlled with the combination of the reed relay setting and the digital switch setting and the code is in function outputCurrentFrequency().
  if (currentMode == 0) //X4
  {
    digitalWrite(RELAY, HIGH);
    digitalWrite(FREQ_MULT, HIGH);
    freq = (168.5 * 10.0 / (25.0 * wiper / 1024.0) + 1.5) / 4.0;
  }
  else if (currentMode == 1) //X2
  {
    digitalWrite(RELAY, LOW);
    digitalWrite(FREQ_MULT, LOW);
    freq = (168.5 * 10.0 / (25.0 * wiper / 1024.0) + 1.5) / 2.0;
  }
  else if (currentMode == 2) //X1
  {
    digitalWrite(RELAY, HIGH);
    digitalWrite(FREQ_MULT, LOW);
    freq = (168.5 * 10.0 / (25.0 * wiper / 1024.0) + 1.5);
  }
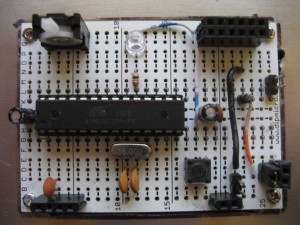
Below is a picture of this signal generator. The switch on the top-left is used to change the output frequencies. When switched to the left, the output frequency decreases (the interval is determined by the resolution of the digital potential meter used and the frequency divider setting) and when switched to the right, the output frequency increases. The output frequency can also be controlled using the serial interface (bottom left) if connected with a computer. If serial interface is used, the frequency can be entered through the terminal and the output frequency will be chosen so that it is the closest to the one entered. The headers to the top right corner are the divider frequency output from 74VHC4040 (divided by 2, 4, 8…. 4096), and the LTC6905’s output is located at the bottom right next to the jumper. The jumper is used to connect the output from LTC6905 to the input of 74VHC4040.
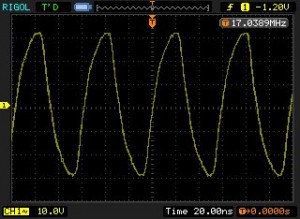
The following is the captured waveform of the lowest frequency output from LTC6905.
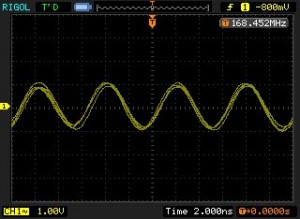
And here is a picture of LTC6905’s highest frequency output. While the theoretical frequency range of LTC6905 is between 17MHz and 170MHz, the actual reachable range will be slightly off due to the finite resolution of the digital potential meter used.
In my implementation the sinusoidal waveform is less than ideal, this is largely due to the use of protoboard. In general, a well designed PCB should be used for circuits operating at high frequency. But for my own use, the output waveform is more than acceptable. The metal casing also helped the stability of the output quite a bit.
The next few waveform captures show the divided frequency output at divider output 2, 4 and 4096 when the LTC6905 output frequency is set at its minimum. As mentioned earlier, the 74VH4040’s outputs are square waves:
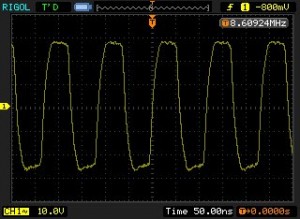
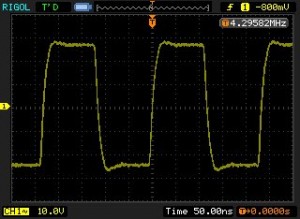
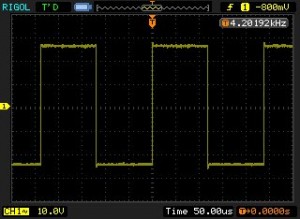
When LTC6905’s output is set at the lowest level (approximately 17MHz) the 12th stage’s output (DIV 4096) is roughly 4.2KHz and thus the full range of this RF signal generator is approximately from 4KHz to 170MHz.

